I often get questions about Exadata, running Oracle Database on Exadata, and running Oracle Database in general.
A more “general” database question I got recently—though it has an Exadata and Exascale basis—is, “How can an administrator prevent a standby database from being used in a switchover or failover event?”
Why would you prevent a standby from being used for its core purpose?
This needs more context. The background is that an organization plans to set up a primary database system and a DR system. They also have a nonprod (dev/test) environment in which they want production-like data to make development and testing more robust. They want to create multiple clones of a gold-image nonprod database so that, when they provide production-like data to developers, they can mask the data once and clone it many times.
They are interested in Exascale for its ability to create database clones efficiently and quickly.
So how does this all come together, and how does it relate to the question?
First, a Data Guard standby database can serve as the source for subsequent database clones on Exascale. Oracle recommends using a secondary standby database for this purpose, to separate the DR function from cloning. In other words, use at least two standby databases—one for DR and one as the source of your clones.
See the Exadata Exascale Best Practices for Database Snapshots and Clones paper for more background and details.
The second standby database is kept up to date by the primary, as with the DR database.
You can then create a clone from the second standby database and mask it with your favorite tool, such as Enterprise Manager, to create your gold‑image database.
Finally, you can create database clones using gDBClone at the CDB level, or run ‘CREATE PLUGGABLE DATABASE clonepdb FROM sourcepdb SNAPSHOT COPY;’ for PDB‑level clones on Exascale.
The resulting environment looks like this:
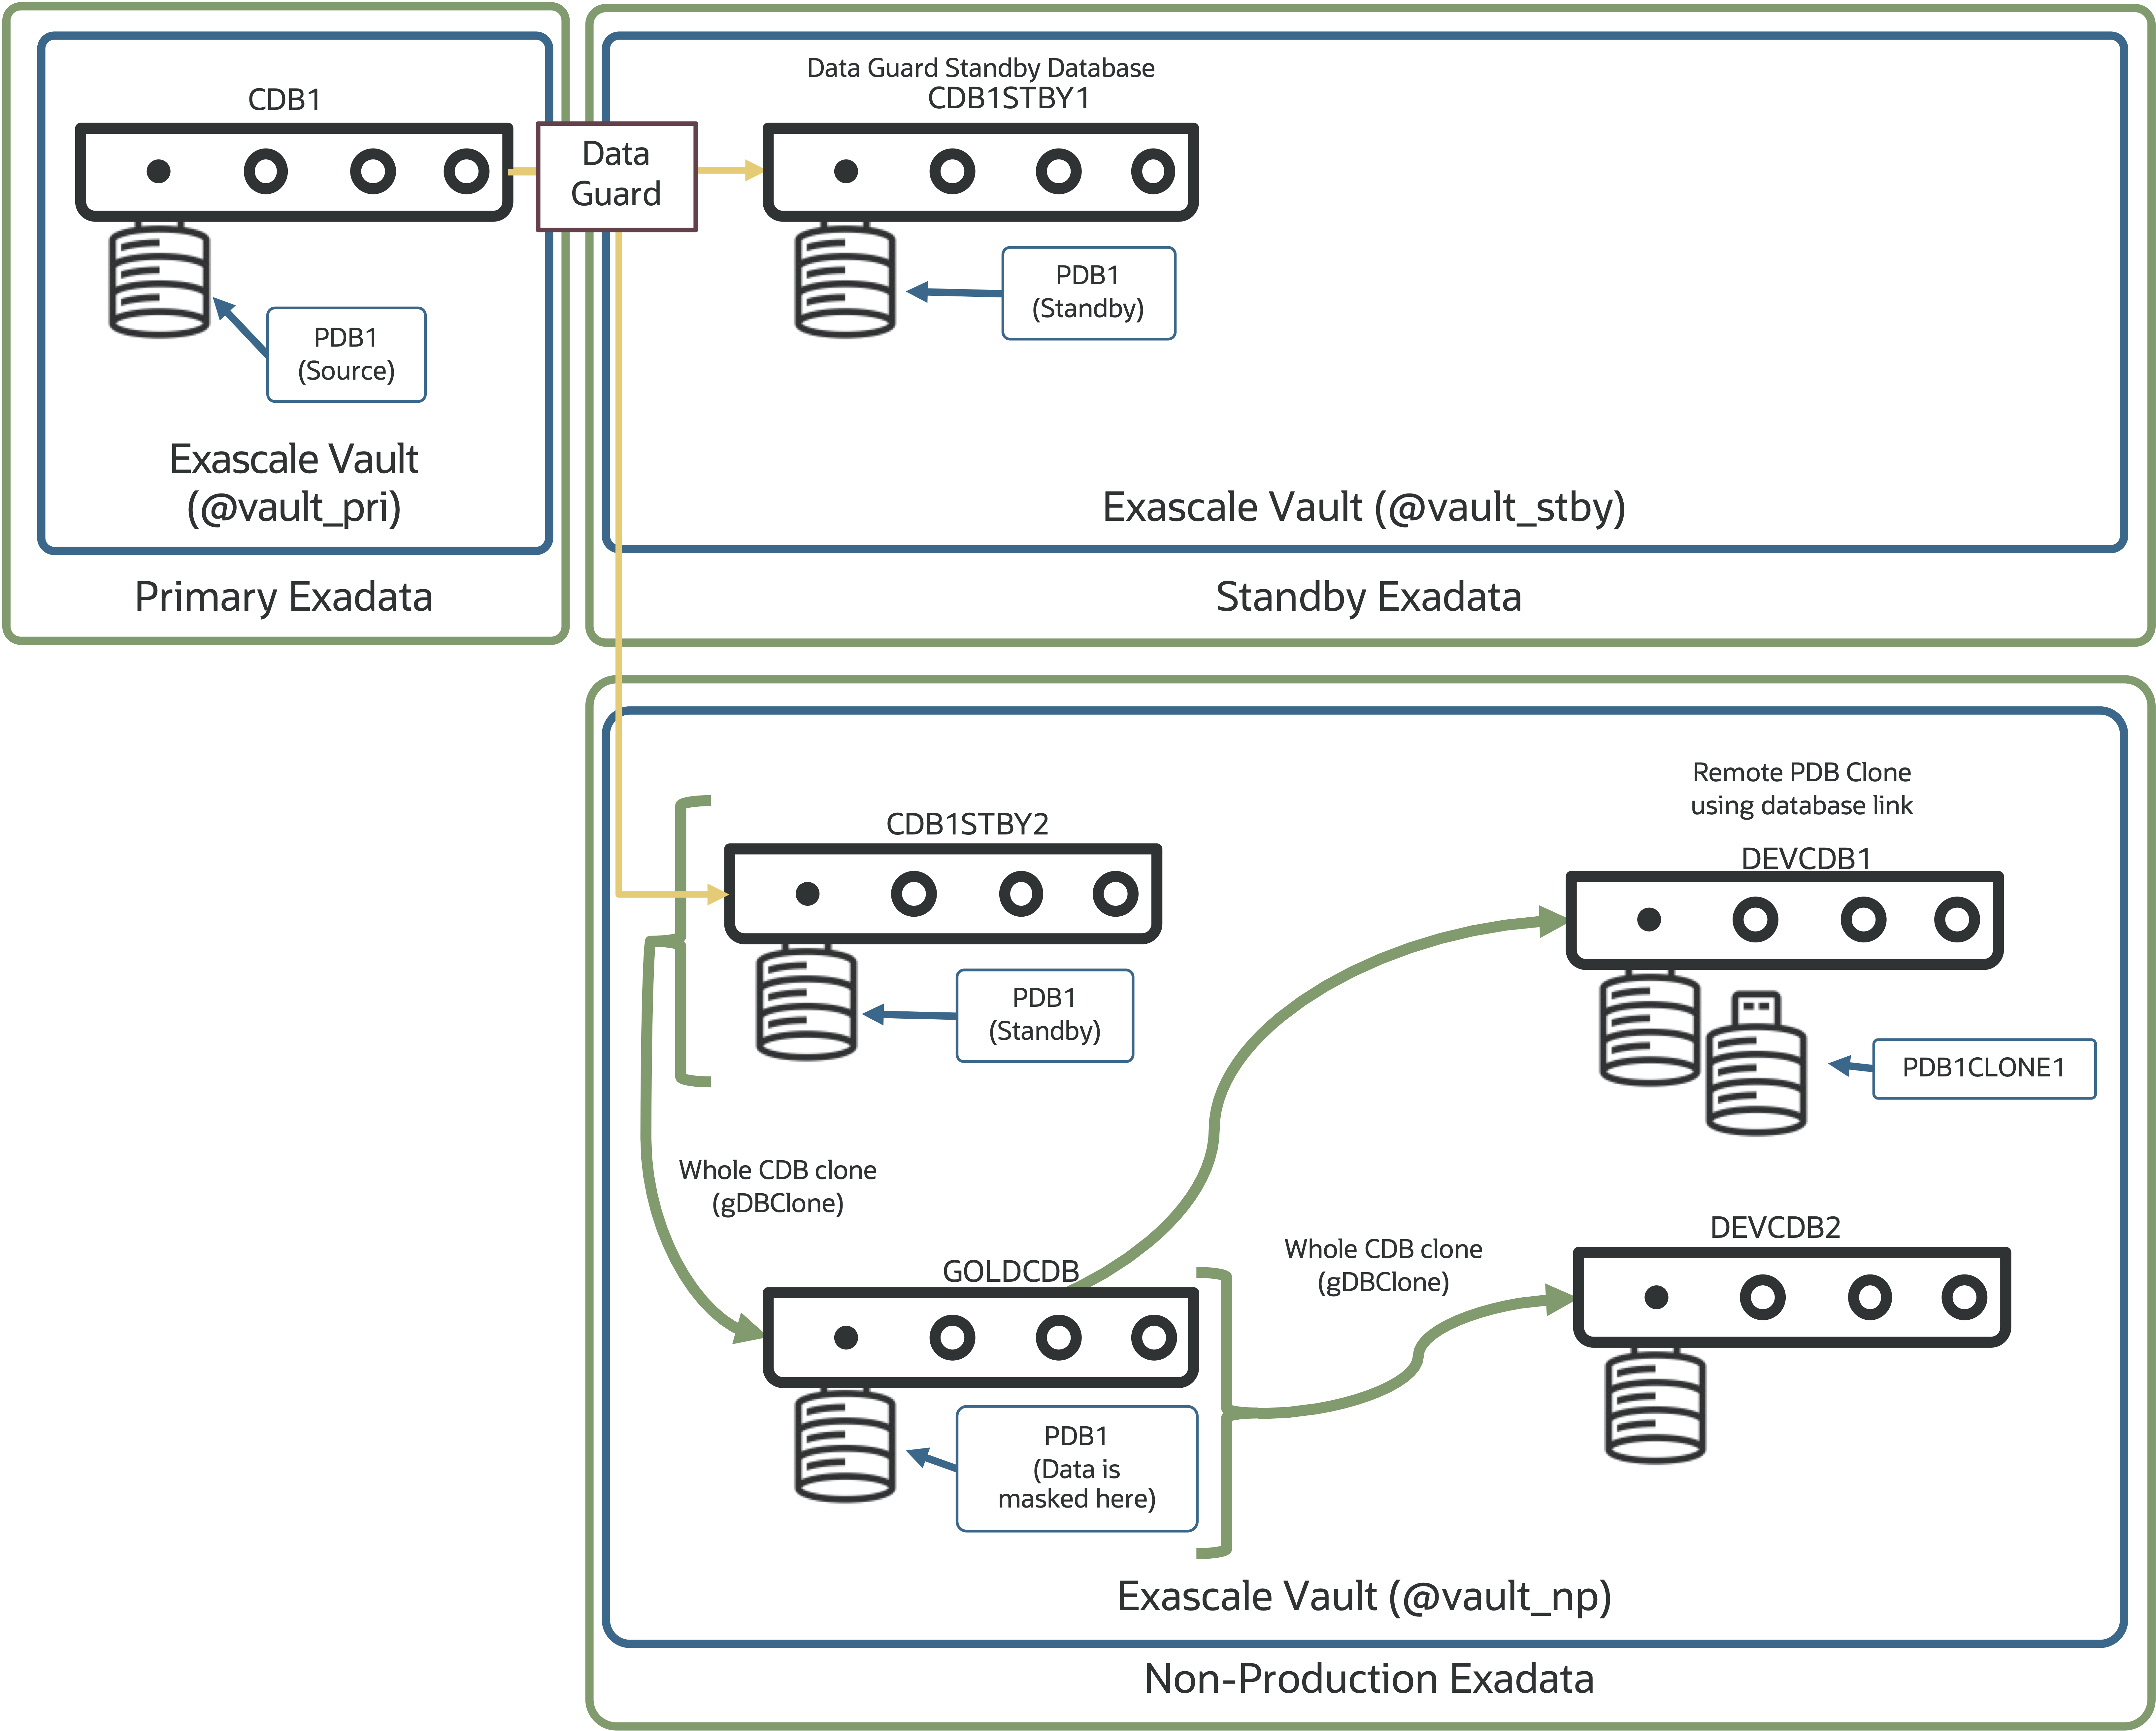
This brings us closer to the initial question: How can I prevent my secondary standby database (CDB1STBY2) from being used for DR?
Let’s come back to why this is even a question.
The secondary standby database (CDB1STBY2) is in a separate Exadata environment—likely in a different network zone and possibly on a system not sized for the production workload.
To prevent the secondary standby from being switched to or failed over, Data Guard Broker (starting with 19.26 and 26ai) lets you specify which databases can assume the primary role using the “PrimaryDatabaseCandidates” property. Any databases in the configuration not listed in this property cannot be switched to or failed over using Data Guard Broker.
What does this look like in Data Guard Broker?
DGMGRL> show configuration
...
   CDB1 - Primary Database
      CDB1STBY1 - Physical standby database
      CDB1STBY2 - Physical standby database
...

DGMGRL> edit configuration set property
> PrimaryDatabaseCandidates = 'CDB1,CDB1STBY1';
Property "primarydatabasecandidates" updated
If we try to switch over or fail over to CDB1STBY2 now, Data Guard Broker will prevent the operation because we told it not to allow this database to become the primary.
DGMGRL> switchover to CDB1STBY2;
2026-01-12T15:16:23.812-07:00
Performing switchover NOW, please wait...

Error: ORA-16529: Switchover and failover operations are restricted to databases specified in the PrimaryDatabaseCandidates configuration property.

Failed.
2026-01-12T15:16:23.954-07:00
Unable to switchover, primary database is still "CDB1"
And that’s it – using Data Guard Broker to prevent specific standby databases from becoming a primary database is easy, and for environments
If you take one thing away, make it this: keep two standbys—one for DR, one for clones.
If you take two things away, the second is that Data Guard Broker can help ensure only the databases you want to allow to become primary can take on that responsibility.
A quick shout out to Ludovico Caldera who pointed me in the direction of this useful feature in Data Guard Broker.
Cheers!


You must be logged in to post a comment.